Tuesday, 6 October 2015

Gingerbread biscuits and house


Good evening everyone! Hope you all have had a lovely day?

I've spent the day baking and cleaning. From time-to-time, I get into these cleaning moods. This happens around three times every fortnight. This is when I go cleaning bonkers. I clean under every nook and cranny. It is brilliant. Getting the house all clean and sparkling! There is nothing so therapeutic as cleaning... well apart from baking...

So I made gingerbread today. I am practicing for Christmas. To me, you need to think of these things way in advance. I need to find the right recipe, meaning trying out loads and finding the one I love! I have found that one and it is beautiful!

I love the smell of gingerbread baking away in the house. It is all full of spice and warming aromas. Hmmm! I felt like a piece of gingerbread myself. I spilled a whole lot of cinnamon over myself. That along with the ginger flying round the kitchen, well you can imagine! This was magical! All full of happiness and Christmasy scents!

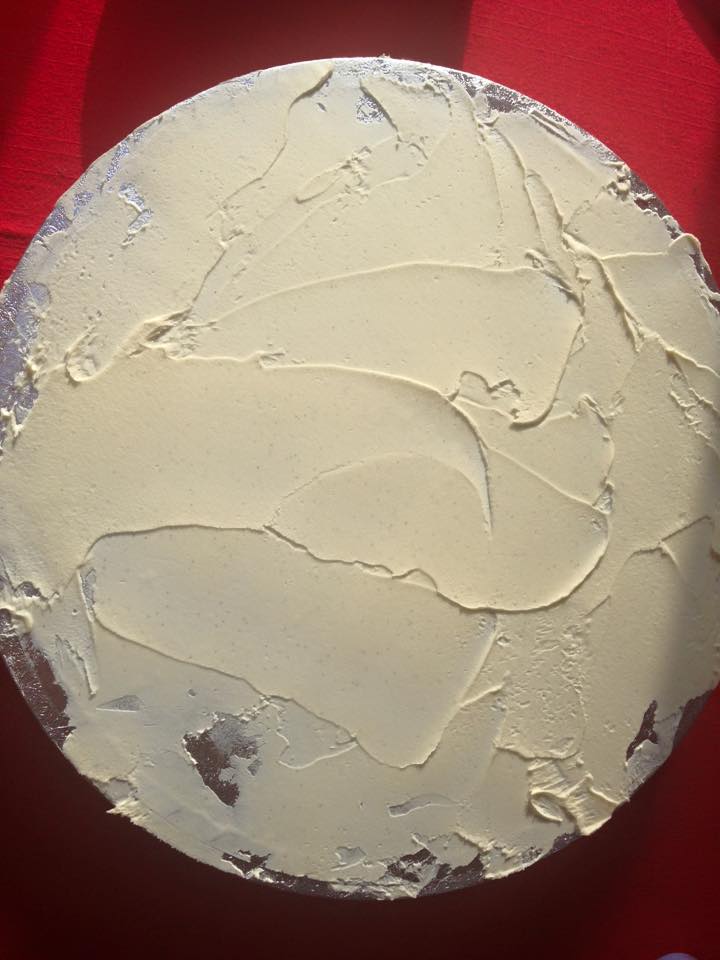
This is a Mary Berry recipe and it is just lovely. The dough is this lovely pale colour and is a soft and pliable texture and consistency. I was and am still in love with this dough.

The ingredients you'll need, make enough for 2 small gingerbread houses and a whole bunch of biscuits as well. I had, what I call a 'Bake Off' moment, in which my little house, constructed with love and icing, with a foundation built on hope, collapsed! Dead! No more! It was morose and it made me feel so sad. I was really proud of this little house until it went SPLAT!

I then made another batch and it was much better. Don't misunderstand, this isn't your normal bread house... It is beautiful and unique to me, but I feel now after making my own, the ones you buy in the shop look a lot different. Not, I'm making a rock and the shop bought looks like a rock, and mine looks like a leaf different. But homemade and in a good way I feel.

I have come to the conclusion, that these are shop bought, therefore they are most likely in my opinion made using machines and big mass manufacturing equipment and maybe they use edible glue. But with mine, there is just me and these tools I call my freakishly small hands. I have small hands. I use royal icing and that hardens yes, but it needs to set for a while, so here I am, looking like i'm posing for an oil portrait, holding this little house together, piece-by-piece. Willing it not to slide and fall.

I've made this recipe my own, by changing the quantities here and there to suit my taste preferences.


The ingredients you'll need are;


- 375g Butter, the recipe said unsalted, but I didn't use that. A) I didn't have any. B) I really don't see the difference. C) It is more expensive.

- 300g Dark Muscovado Sugar


- 150g Molasses, the recipe said golden syrup, but there is a warm spot in my heart for molasses. So molasses I used.

- 900g Plain Flour

- 1 tbsp Baking Soda. It said 1 tbsp, I used 1 tsp.

- 2 tbsp of Ground Ginger, I used 4. I like my gingerbread, like my coffee cake, STRONG.

As you can see, I've changed this recipe a lot, well more than I normally would.


The method to make these are quite simple;

- Preheat the oven to 170 C in a Fan Assisted oven.

- Bung the butter and sugar into a mixer and whisk on a high speed until fluffy, light and creamed together.

- Pop the molasses into the butter/ sugar mix and whisk until fully combined.

- Put the plain flour, baking soda and ginger into one bowl and mix together until combined. Gradually put this into the butter/sugar and molasses mix, spoon-by-spoon.


- Whisk all of this together until it is light and fluffy looking. The mixture should be combined fully and form a dough like texture.


- Pop this out onto a counter top and knead until the mix comes together in a smooth dough. Wrap this in clingfilm and chill in the fridge for 10 minutes.

- Take out of the fridge and roll out to the thickness of a pound coin.

- Cut out whatever shape you like, this could be bells, circles, trees or gingerbread men.

- Place into a baking sheet and bake for 10-12 minutes or until the edges of the gingerbread are just starting to brown.


- Take out of the oven and chill for 40 minutes. This needs to be really cooled before doing anything with it.


To make the royal icing;

- 3 Egg whites
- 675g Icing Sugar
- 2 tbsp Lemon Juice


- Pop the egg whites into the bowl, attached to the whisker and whisk until thick and sturdy.

- Gradually add in the icing sugar into the egg whites until it is all in and fully combined. The egg whites will go from a translucent colour to a thick, white, glossy opaque colour. You shouldn't be able to see through the icing when done.

- Add a little of the lemon juice to loosen the icing a little.

- Pipe onto the gingerbread and connect the pieces.

This is a fun process and takes a little time as you need to let it set and harden.

And that is the gingerbread done! Complete! Finished!


Time to eat!

If you'd like some gingerbread for an order, just get in contact and I would love to cater for that need! My Facebook Page, is CVL Bakes.

Thanks and have a lovely evening!


Sunday, 4 October 2015

Fruity Crumble


Good morning again everyone!

So as promised earlier in the week, I am blogging about my crumble and later about this Novelty Cake I made for a customer. It's is only an added perk that I am getting this post written just before next week. You see I can't help myself, I love cooking, baking and blogging!

So, as you all will probably know, if you read my Facebook Page; 'CVL Bakes', I was away in Donegal for a few days there in the week and what a lovely few days away they were! Beautiful weather; warm and sunny everyday! And I don't know about you, but I was pretty surprised and frankly elated with this weather, as it is Ireland. We're not exactly blessed when it comes to the weather. Nobody lives in Ireland on the basis that we get beautiful weather all the time. At least that is my opinion. Why do you think we have such green surroundings?

Personally, I love the cold and rain. I know, weird. Because (I'm just remembering how my English teacher taught me never to start a sentence with 'Because'- I can't quite remember why, but ah well, this is my blog, so....) out of the rain we benefit from such vibrant, luscious and abundant greenery! It makes everything look so happy to me.  (: - See my smiley face symbol proves this emotion...

Anyway, I made the crumble as I wanted my mother to have something sweet to munch on when I was away. I'm the baker in the house which is ideal, as that is what I do for a living as well as cooking. So, whenever we want something sweet, I make it, it isn't bought. It works in two positive ways;

1) I get to bake!
2) The house is filled with the smell of baking... yum!

This crumble is fresh, fragrant and fruity! Like my Fricative Alliteration?

You'll be needing a baking dish, preferably ceramic or glass. But anything that is oven proof works. Butter this with some melted butter and set aside as that it all the prep done.

Then set the oven to 180 C in a Fan- Assisted Oven.

So the oven is heating , the dish is waiting, now we need the ingredients to fill both those purposes.

The ingredients that you will need are;

For the Filling:

- 4 Apples, I know most recipes say cooking apples, but I always use whatever we have, be them cooking or eating apples.

- 1 punnet of Blackberries, or if you have them growing in the garden as we do, even better. Although I forgot about this and had one very sad looking mother staring at these shop bought berries. Lol.

- 1 punnet of Blueberries.

- 10g Butter

- 20g Sugar, I used soft brown sugar, but will also use Caster, depending on what I have.

- 1 1/2 tsp Cinnamon

- 1 1/2 tsp Nutmeg

- 1 Lemon Zest grated


For the Topping:

- 120g Plain Flour
- 60g Butter
- 60g Caster Sugar


Method:


- The first thing you want to do is peel the apples. Do this and then chop the top and bottom off. Cut into four chunks and then those in half. Put these into a pot, the one you'll be cooking the fruit in. Once all the apples are in, grate the lemon zest over them with a little cold water. This will stop them from browning, maybe not entirely, but partially at least.


- Turn on the hob ring to about medium heat, I used number 4. Then whilst the pot is heating, pop in the butter and allow this to melt and bubble away. Add some more water if the apples start to caramelise and brown, instead of soften and infuse.


- Then once the apples are softened, they'll look slightly yellower and will have little bits falling off occasionally, add the sugar, cinnamon and nutmeg and stir. This will turn the apples a deep woody colour and will smell amazing. They'll turn from looking soft, to slightly caramelised and stickier.


- Let this bubble away until you have come to the consistency that you like and they are soft enough. You want most of that water you put in to have cooked away. Some people like the apples softer than others. So make it your own and be innovative with it!

- Now you want to add the Blackberries and Blueberries. They don't need a lot of cooking, if any at all, but I like to warm them through and give them a chance to take on the flavour. Toss them in and mix them around. They'll burst and ooze out their juices, turning the apples this deep purple colour. Yum!


- Pop this into the buttered baking dish and leave to cool slightly.

- To make the crumble topping, get your food processor and bung all the ingredients in together. Mix the flour and sugar slightly beforehand so the crumble won't go gritty slightly.


Blitz this until it resembles breadcrumbs and then sprinkle over the cooked fruit and bake.


However, if you do not have a food processor, get a cool bowl. Pop in the cubed and cool butter and rub this into the sugary flour with your finger tips or a fork. Whatever works for you. Do this until they look like breadcrumbs. Before you forget what they are and are about to go and add them to your meatball mix, stop, this will do bad things to your meat.

Oh yeah, I had a few raspberries around, so put them in too
Sprinkle over the fruit and bake.


- You want to bake this for around 40 minutes until the fruit bubbles up around the edges and that purple juice starts to ooze out the sides. Yum Yum Yum! You will also need to wait until the crumble topping has gone this golden-brown colour and is crusty to the touch. You don't want it to still feel squishy and soft, it won't be done if it is like that.

Serve this warm or cold with whatever you want.


I always feel vanilla ice cream or custard goes the very best with it. But then again, you might like fresh fruit or cream with yours? You could even have salad with it, whatever makes you happy.

I hope you liked this one as well and talk soon!


Thanks again!

Have a lovely day!

Fork Biscuits


Hello!

This is going to be a short post, because it is a short recipe.

These are some really simple, really easy little biscuits! they're the kind of recipe that are great for kids, as they are hands-on and really fun to make!

The ingredients you'll need are;

- 4 oz Butter, really soft but not melted

- 2 oz Caster Sugar

- 5 oz Self Raising Flour


Method:

All you need is a tray with some baking paper on it and a fork. Preheat the oven to 180 C in a Fan Oven.

- Put the butter and sugar into a bowl and beat together with a wooden spoon. Cream them until it becomes soft and a lighter colour and fluffy like texture. You'll know it is mixed enough when the butter/sugar mix coats the bowl and not the spoon.


- Add the flour. The most difficult part of this recipe, is trying to keep the flour in the bowl, yeah I know, easy peasy, lemon squeezy!


- Once the mix starts to come together, get your hand in there and squish and knead it together until it forms a smooth, light ball shape.


- Take this and pick off little walnut sized chunks and roll into a ball shape. Pop onto the baking tray. Do this for as many as the dough will provide.


- Wet a fork with some water and press this down onto the ball, to flatten it. The water will stop it from sticking. This will make them fork biscuits, duh!

- Pop them into the oven for 10-12 minutes. Keep an eye on them though, making sure they don't burn. Oven are all different and can cook slower or faster, so keep checking them. You want to wait for them to flatten out and be golden round the edges and firm-ish to the touch. Not rock hard, but not as soft as they were when they went in either. :)


- Take them out and allow to cool on a rack. They'll harden up as they cool.

That's it, simple as!

Thanks

Heavy Metal Themed Drum Cake


So, I had an order for the 3rd October for a heavy metal themed cake. This was a really exciting one for me, as it required a lot of creativity and fun! Both of which I had! This was a cake that would be the shape of a drum.

This was a big cake and took around 5 hours to construct. This is what I did;

1) Clean the kitchen, with my trusty steamer. I do this to sterilise the whole kitchen.
2) Get into my cooking wear, being my chef coat and trousers and hair cap.
3) Wash hands.
4) Get all of my ingredients out of the cool area or fridge.
5) Prepare my cake tins, 3 x 25cm with baking paper.
6) Preheat the oven.

7) Measure out the ingredients.
8) Make each cake batter amount, one at a time so I know each one is even in weight.
9) Once all filled, bake the cakes for 45 minutes or so.
10) Wash hands.
11) Check the cakes.
12) Take cakes out of the oven and place onto a cooling rack in a cool, dry place.
13) Wash dishes and hands.

14) Get buttercream ingredients out.
15) Make buttercream.
16) Wash hands.
17) Cover buttercream and leave aside.

18) Prepare cake board, roll out white fondant to the needed shape.
19) Buttercream the cake board with a thin layer of buttercream.
20) Drape the fondant onto the cake board and use the smoother to even out and get rid of air pockets.
21) Chill in fridge to set.

22) Check cakes are cool.
23) Once cool, butter cream and layer them.
24) Place this onto the chilled ans set cake board.
25) Chill cake in fridge.

26) Roll out black and white fondant icing to create a tie dye effect.
27) Trim to the size needed.
28) Drape around the side of the cake to cover the sides and press firmly to stick on.
29) Wash hands, as Icing and fondant make hands dry and sticky, but still clean of course.

30) Roll out black fondant and cut to size.
31) Place on the base of the cake at the top and match up with the icing on the side.
32) Use the cake smoother to smooth out.
33) Roll out white fondant and cut strips to create the frame of the drum.
34) Spray with shimmer spray to give a nice coating and shine.
35) Damp the back of the strips with water as this will help stick them onto the icing sides.
36) Stick strips onto the side.

37) Chill cake once all icing is on.

38) Cut out the lettering for the AC DC and the Happy birthday message
39) Set aside to set and firm up.

40) Take the cake out of the fridge.
41) Damp the backs of the icing letters and stick onto the cake.

42) Check the cake to ensure everything is even and neat and tidy.
43) Place cake in a dry, cool area, covered and safe.
44) Prepare receipt and all the other things that go with my orders.

45) Done.

As you have read, there are a lot of steps to making this cake and cakes like these. But I love this cake and had so much fun making it. Yes there were stressful times as I am a perfectionist of sorts, but it was really fun. The best bit is seeing it turn from one things to the finished product. It was really cool seeing it all coming together step-by-step.

The ingredients you'll need are, for a cake of this size,


For the Cake:


- 660g Self Raising Flour
- 660g Butter
- 660g Caster Sugar
- 12 Eggs

For the Buttercream:

- 200g Butter
- 400g Icing Sugar
- 2 tbsp Vanilla Extract


Method:

- Put 220g of the butter and sugar into a mixer and mix on a high speed until light and fluffy. Add 2 eggs and then mix slowly then quickly, as to not scramble the eggs. Add 220g of flour and mix until combined and loose. This is enough batter for one 25cm cake.

I did it in three batches as wanted to get all the cakes the same size and weight.

- Put the batter into the cake tins, that are lined with butter and baking paper and then smooth them out using a pallet knife or something along those lines.

- Bake in a 170 C oven for 40- 45 minutes or until golden brown, bouncy to the touch and when a skewer comes out clean.

- Put onto a cooling rack out of their tins, in a cool, dry room to cool completely.

- To make the buttercream, cream the butter in a mixer until soft. Gradually add the icing sugar, spoon-by-spoon to ensure it is all incorporated evenly. Add the vanilla and this will loosen it a little making it easier to ice with.

- Ice the cakes once cool with a thin layer of buttercream in the middle. Place the cakes on top of each other, using the buttercream to stick them together. Then ice the sides.

- As discussed above, roll out the various fondant icings and layer onto the cake and flatten with the cake smoother.


And that is the cake done! Yum!

I really loved making this cake, as said many times lol. It was really creative and fun. I hope that you all enjoyed hearing about it too!?

Thanks again!