Tuesday, 27 October 2015

Lemon Drizzle Cake


This was another lemon drizzle I made

Good Morning Everyone!

So the past few days have been really busy. I was catering for a film crew and cast last week. It was a lot of fun! It wasn't as busy as the last one as it was only a small crew and cast and they only needed lunch. This was great experience for me, as it gave me the opportunity to widen my experience in this field and it also allowed me to understand and get first hand experience on what it was like to cater for different sizes of people and to their different individual needs.

Plus I got to see around different places which is always interesting, as I come from a very nosy family. I do love being nosy.

The catering was busy as it involved going through the following process;

1) Liaise with who was requiring the catering
2) Settle upon a few menu choices
3) Costing said choices and seeing whether that would suit
4) Working towards a budget
5) Finalising menu and then adapting it to fit certain specifications - a good skill to have

6) Putting together a list for the shopping
7) Buying ingredients and then refrigerating them and/or putting them into dry, protective storage
8) Planning what equipment is needed and when I need it during the cooking process

9) Maths, working out amounts, portions, cost per portion and bulk. This made it easier to see how much of each dish I would need to make for each person and the overall group of people. Maths can be very confusing. It is like saying your name over and over and over until it means nothing, literally. Try it!

Well I was checking and checking and checking my calculations with two different calculators and hard copy to ensure I was right with the portion sizes. Need to be thorough, but this gave me a migraine. The G&T came out that night, not while cooking of course though.

10) I made the food the day before delivery so it was as fresh as possible. I couldn't make them on the day as the delivery time wouldn't have given me enough time to make the dishes. So what I did was;

- Pre Clean, this is when I cleared away any ingredients into their storage and cleaned away any dishes. As I am a home caterer there occasionally will be dishes in the kitchen, but I always clean that all away before starting.

- Clean all the counter tops with sanitiser and a one use cloth. Then the cupboard doors. The oven. The sink. The fridge. The radiator. The table. And then I steam the floors. Put the dog's bowls out of the kitchen. So the only thing left is the clean kitchen, steamed and cleaned and me, in my cooking wear.

- Then I start cooking, so for example I made Chicken Tarragon and Pasta Bake. So that meant meat.

I would take it out of the fridge when I needed it and then began to prep it. I would get out my red cutting board and knife for meat cutting and cut it. Then cook it.

11) When the dishes were cooked they were cooled and then put into the fridge, labelled and covered.

12) Day of delivery, I would pack the car with the equipment that I needed and then when we were about to leave, I would put the dishes in the car. Then we drove them to their location and I served them.

13) Brought the dishes back.

14) Did the dishes and threw away any rubbish.

15) Changed into my cooking wear, cleaned the kitchen and started cooking the next dish.

So basically it was pre clean, cooking wear, clean the kitchen, cooking, cooling, storage, packing, delivery, reheat, serving, packing, cleaning. Repeat.


Anyway, yesterday I made a Lemon Drizzle cake for an order today. It was lovely baking again. I love baking and it is so enjoyable and relaxing. I listened to Hamilton whilst baking. This is something my sister turned me onto. It is so good!


So the ingredients you'll need are;

- A loaf tin, greased and lined with baking paper.

CAKE:


- 165g Self Raising Flour
- 165g Butter, softened
- 165g Caster Sugar
- 3 Eggs
- 2 Lemons, zest and juice

SUGAR SYRUP:


- 2 tbsp water
- 50g Caster Sugar
- 1 Lemon, zest and juice

LEMON ICING:


- 50g Icing Sugar
- 1 Lemon, zest
- Enough water to make a thick, but not runny icing


METHOD:


- Grease and line the loaf tin with the baking paper and set aside for when needed.

- Pre- heat the oven to 170 C in a fan assisted oven

- Put the butter and sugar into a bowl and mix until light, fluffy and combined.


- Add in the eggs along with the lemon juice and zest and mix briefly.

- Add in the flour and mix on a high speed until it is light and combined thoroughly.


- Put this mix into the cake tin and pop into the oven.


- Bake it until it has risen, browned and is cooked all the way through. It will and should have a crack in the middle. This makes it look more appealing to me.

- To make the syrup, put the sugar, water and lemon into a pan and heat until it reached 130 C and is bubbling, all syrup like and lovely.


- Once it is baked, allow to sit in the tin for 10 minutes. When it is in the tin, spread on the sugar syrup, this will make the cake moist and give it a really lovely zing.


- Then take out and allow to cool on a cooling rack.


- Once the cake has cooled, pour over the icing.

- To make the icing, put the icing sugar into a bowl and dribble in enough water to make a thick, but not stiff icing. You want it thick enough to set, but not so thick as it won't spread.

- Grate the lemon zest over this and it is done!


Simple and delicious! All lemony and delicious!

I really enjoyed making this as it was great fun and relaxing. Plus it is hard to beat a lemon drizzle. The icing is lovely as it kind of mellows out the lemon and brings the whole thing together.

I making some iced fingers today, or at least am planning on. Will update you on how that goes.

Thanks and hope you enjoyed this!?

Ciara

Sunday, 18 October 2015

Cinnamon Buns


Good Morning you lovely lot!

Yesterday I made Cinnamon Buns! Why you ask? Well I have an order for them in a few weeks and had never made them before. The obvious thing to do to correct this lack of experience would be to try them and get to know what they should feel like, smell like and taste like. Taking texture, appearance and aeration into thought.

This of course being 70% down to the yeast and whether it activates or not. 20% depends on the day, is it a humid or slightly warmer day? If not, radiators or ovens being on and warm atmospheres provided by boiling pots of water are needed. 10% Human ability. I have to make sure that I am weighing the ingredients precisely, kneading the dough long enough, not over proving the dough, rolling it out correctly as to not knock out all the air and baking it long enough.

(I promise to my mother now for everyone to witness that I will not boil water to the extend of last time... I'm somewhat of an experimental cook/ baker in a way...)

Let's just say, I had to wash the walls down. Leave it there.

Anyway, I am glad to say that these turned out just as desired. They were golden, fluffy and full of cinnamon and height. If they hadn't been, I wouldn't be blogging it. (:

The equipment you'll need for these buns are;

- 2 Baking trays; greased with oil or butter and leave aside to sit. I would cover it though in case of dust. But whatever you think...

- Scales; to weigh the ingredients

- Air tight container; clean and with a lock to seal tight

- A Rolling pin; to roll out the dough

- A Sharp knife; to cut the cinnamon buns into parts

- Pastry Brush; to brush butter and glaze onto buns

- A Spoon

I have listed the equipment in order of use and need.

This is a Paul Hollywood recipe. I've made a few adjustments to make them my own though, which is good. Now I can call them my own. Isn't that what recipes are for, finding a starting off point and then letting your creativity take over? Making them your own and unique to you and what you like and don't like.

http://www.bbcgoodfood.com/recipes/1803633/christmas-buns

Ha! Look at that, I discovered the link adding thingamabob! :D

The ingredients that you'll need for these buns are:

Paul said these make 9 Buns, mine made 7, but I has scrappy ends so maybe they could have made up the extra 2?

DOUGH:


- 500g Strong White Bread Flour. This is one of those times where I have to say that it must be strong white bread flour. Plain flour or baking flour won't do.

- 7g Dried Fast Action Yeast. This is handy as where I buy my yeast, it comes in packs, sealed and airtight. It is only an added benefit that they are 7g portions as well.

- 300ml Milk. In his recipe it didn't specify what milk. I used a mixture of whole milk and semi skimmed. 240ml of whole : 60ml semi skimmed.

- 40g Unsalted butter

- 1 egg

- Vegetable Oil, again no exact measurement. This is for the bowl or container you are proving the dough in. I used spray oil, which is just oil in a spray bottle to put less in. I used 12 squirts to cover the container I was using.

If you want to know, this equated to 24 Calories as 1 squirt = 2 calories.


FILLING:


- The recipe stated to use 75g Brown Sugar. I used 80g of Golden Caster Sugar.

- 25g Unsalted butter; melted

- Again the recipe said to add 2tsp of Ground Cinnamon. I used 3 tbsp, as it wasn't strong enough in cinnamon for my taste. I mean, these are called cinnamon buns, hence there should be a strong taste of cinnamon. It's like me having a birthday party for my sister and then not inviting her. What is the point in calling it her party?

Paul's recipe called for a lot of fruit in the dough middle. I didn't want that. Mainly because I was going for a more traditional Scandinavian Cinnamon Bun. I found a recipe online, but wanted to use a recipe I knew more, combining the two. Anyway, there was nary a piece of fruit in this Scandinavian bun recipe to be found.

Conclusion: I added no fruit; again making it more my own and similar to this Scandinavian recipe I found.

Although, the only two differences I can find between the two types of buns, probably in my own ignorance, are the glaze. Paul's recipe calls for icing sugar and water (I left out the lemon) and the Scandinavian recipe calls for Pearl Sugar. Look I might, in fact all over the shops, can I find pearl sugar- the answer is no. I would have to special order it. I guess there isn't a great need or demand for it in Home Baking and Catering which is what I do. I'm a home caterer and all food is produced in my kitchen.

And second, the sugar, one calls for soft, brown and the other granulated. As I am trying to make these more a Scandinavian influence, I used golden caster, as it has a more granulated feel.

This can all be put down to one's interpretation.


GLAZE:


- 50g Caster Sugar
- 4 tbsp water

- Heat these in a pot until the sugar is dissolved and is bubbling away in a syrup like fashion. Don't touch it. It'll not just burn a little for a second, like when you lean on a hob ring that is on or was. It is like a clingy overgrown baby (7 yrs) (my opinion being that cut off should be 1 or shortly after), still wanting to breastfeed. This sugar will latch onto your skin and suck until it pulls it off. Or at least makes it feel like that. Descriptive enough for you?

ICING ON TOP:


- 50g Icing sugar
- Only enough water to give you a thick icing

- Put the icing sugar into a bowl and put a little water in at a time until it becomes a thick paste like texture. If you put too much in, just add more icing sugar.


METHOD:

- The recipe says to grease your tin now and leave aside. I do it when I need it.

- Weigh out the ingredients and leave aside ready for use shortly.

- Into a mixer, put in the flour and salt and give them a brief mix to combine.


- Heat the milk and butter in a pan over medium heat until the butter has melted and it goes from having flecks of yellow, to having a yellow covering.


Think of it as Pâté, it'll go from having no yellow topping to one with a yellow topping. This is thanks to the butter being melted.


- Once this has melted and has cooled down to the lukewarm stage, add in one whole egg. Do this while whisking the mixture, as even though a very small chance, it might still curdle. It won't, as mine didn't if you whisk while adding.

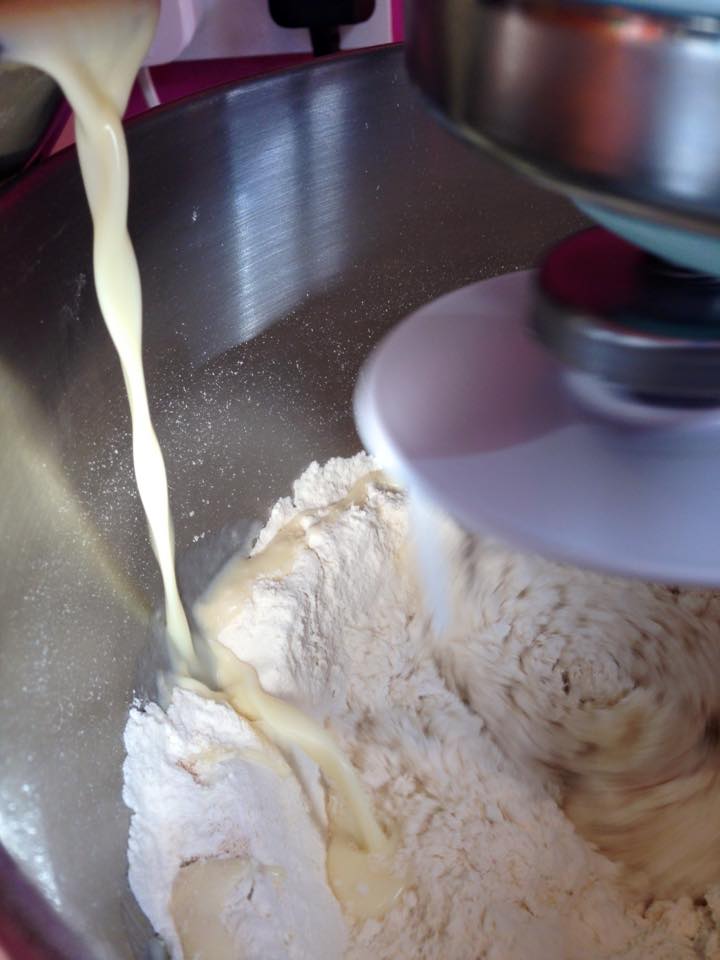
- With the mixer on a low speed, gradually and slowly pour in the egg, milk and butter mix until fully combined.


- Mix this on the bread hook attachment until the dough is formed, it isn't sticky and is coming away from the sides. Another good way to make sure it is done is to press your finger on it gently. If and when it doesn't stick to the dough and the dent in the dough fills itself again (it has elastic properties to it) it is done.

- At this stage, you want to oil your chosen container and plop the dough in it to prove and rise for around 40 minutes or as I left it for maybe an hour.


- There's nothing much else you can do at this stage. Entertain yourself. (:

- Once the dough has rise to double its original size, make the filling.


- Melt the butter and leave aside. Combine the cinnamon and sugar together into a bowl and leave aside as well.


- Take the dough out and plop onto a lightly floured surface.


- Roll it out to a rectangular shape until it is 1cm thick.


- Brush on the melted butter all over the rectangular dough and then sprinkle with the cinnamon sugar.


- Roll the dough into a tight cylinder shape, length ways so that it is longer and slightly thinner, as opposed to shorter and slightly thicker.


- Cut off the loose ends that are a bit tragic looking if there are any. Cut into even pieces and sit onto the greased baking sheet that you'll now have. If the end of the dough, where the roll was finished is coming away slightly, just give it a pinch and that'll stick it.
Note to Self: Do NOT use baking parchment. Use butter and flour as it'll make it easier getting them off when baked.

- Cover with cling film and allow these to rise for 30 minutes again. Whilst they are rising for a second time, preheat the oven to 170 C Fan Oven, 190 C in others, Mark 5 Gas.

http://www.bbcgoodfood.com/recipes/1803633/christmas-buns

- Once the buns have risen for a second time, put them into the oven and bake for 20-25 minutes until they are golden brown and risen. I took mine out when they looked the correct shape and were lightly golden on the edges and tops.

- They'll look kinda bread like and not so much bun like at this stage, but only in appearance.


- To make them more bun like in appearance, brush over the sugar syrup, sides and all. This will not only give them a sweet and sticky coating, but it will also give them an attractive shine, making them appealing to look at.


- As if this wasn't enough, add the icing sugar icing. This is made with icing sugar and water. Once you have the desired, thick texture, use a spoon or piping bag to dribble over the buns. No too much as that is another Scandinavian influence I think. Using less icing. So instead of coating them in the icing all over, I only dribbled it over.


- Put them onto a cooling rack to cool and they are done!


I really enjoyed making these and it was great learning a new skill! I hope you try them too and make your own twists and adjustments as I did to make them your own.

Thanks

Ciara


Tuesday, 13 October 2015

Coconut Macaroons


Hello everyone!

Its been a few days since I've last posted and felt the need to post, so here I am. :)

There is something really Christmas like to Macaroons I think. I feel really Christmasy at the minute Who knows why really? Maybe because it is only 10 Friday's until Christmas? Maybe because I am making Macaroons?

You might be a Scrooge, but as far as i'm concerned, I'm an Elf, with a capital E. Again, who knows why? Noun comes to mind... person, place or thing. This is definitely two of the three.

I had never made these type of Macaroons before, notice the extra 'O'. A lot of recipe spell Macarons with two O's, when it should be one. They are almond based.

1 x O = Macaron- Almond Based

2 x O's = Macaroon - Coconut Based

This is a recipe off the All UK Recipes site on the internet. I like finding recipes and trying them out, if for no other reason than to mess about.


The ingredients you'll need are, these make 10 ice-cream scoop sized macaroons. Nearly made the mistake of only putting in one O there. Whoops!

Ingredients:


The ingredients that you'll need are;

- 2 Eggs
- 225g Desiccated Coconut
- 150g Caster Sugar

The method is pretty simple. So simple in fact a pigeon could do it.

What you want to do first is;

- Line a baking sheet or two with baking paper. I used the baking paper for baking specifically, but you could also use baking parchment or whatever you have handy.

- Put the eggs into a mixer and whisk on a high speed until thick and fluffy.


- Gradually add in the sugar and whisk until this forms a thick base. The kind of thickness you would get, were you making a Swiss Roll. But we aren't, so...


- Add in the Desiccated Coconut and whisk until fully combined and holding its shape.


- Let this sit, stand, rest, basically don't go faffing around with it. No touching for 20 minutes!


- Then, once the mix has sat, for who knows what reason, probably something scientific, wet an ice cream scoop.

- Use the ice cream scoop to plop out little mounds of coconut goodness and space around 3cm apart from each other. No, they don't spread apart much, but a little. Nobody wants their little Macaroons to turn and morph into one big, beast of a Macaroon.


- Bake these are 190 C in a Fan Assisted oven for 20 minutes or until they are golden brown and dry on the outside. In that you don't want them to stick to your hands when touching them. You remember our discussion about faffing? Well...


- When cooked and smelling all Christmas like, take them out of the oven and allow to cool on a cooling rack for a while. They will eventually set and firm up more. You won't think it, I didn't. But rest assured they will!


And that is it as they say!

You could of course grace these little treats with some melted chocolate or cherries. Even marshmallows. Anything really! I might add chocolate next time.

Notice this recipe didn't use rice paper. I was quite glad at this as yes, it does mean you have to use a spatula to release them from the paper a little, but I couldn't find any rice paper. If you know where to acquire it, please tell me.

Although, after I made these, I tried a different recipe. This time a Nigella Lawson one. In her version, which I used, she said to have the following ingredients;

Ingredients:


- 2 Large Eggs, whites only. Keep the yolk for french toast or something.
- 100g Caster Sugar.
- 30g Ground Almonds.
- A dash of Vanilla Extract.
- 250g Desiccated Coconut.

She said to add a few more ingredients like cream of tartar and salt, but I didn't bother. Making them my own I guess, putting my own twist on things.

Method:


- Whisk the egg whites until frothy, white and forming soft peaks.

- Gradually add in the sugar, a little at a time to make this into a meringue like texture.

- Fold in the desiccated coconut, almonds and vanilla.

In the last recipe, the Macaroons, even though they were still yummy, they were softer in texture. This, I have come to the conclusion is due to the fact that I didn't press them together enough. I did for these ones.

Once they were combined, I got my hand into them. Clean, don't worry. I scrunched the mixture and pressed them together so that they formed sturdy mounds that didn't fall apart when being moved around. Yay!


I then baked these for 15 minutes at 170C in a fan assisted oven for 15 minutes or just under that. I baked them not until they were golden brown all over, but just until they were flecked with little golden brown patches. This I feel make them look different, unique even. And frankly, to me more appealing.

I then left them to cool and even though, a little firmer in texture, I think after tasting both they were better both in convenience in eating them. They didn't fall apart when lifting them and eating. And they had that more chewy texture that I would expect from a Macaroon.


Comparison done and dusted! Yum!

Thanks and hope you all enjoyed this.

Ciara