Good evening everyone,
A few nights ago, I was in the mood for something ooey and gooey and down right full to the brim with chocolate goodness! I also wanted to bake something that I hadn't baked before. So I made these delicious Millionaire Shortbread!
I've always wondered why it was called 'Millionaire Shortbread'? Is it because they are so good, that they would be worthy of a Millionaire? Then again, they are so 'fandabbydosey', I should think they'd be worthy of anyone, regardless of their financial circumstance. The reason for their name is something I probably could have found out ages ago, had I really wanted to know. Happily, at the moment anyway, this remains a wonder, but nothing urgent or dire.
Technically I've never made these before, and technicality is everything. The truth being, I've never completed making these. There was one, dark time, when Ciara (yes, I'm now referring to myself in the third person) attempted to make this delicious snack/ nibble. This went very badly. The tragic truth being, the caramel basically exploded and burnt my hand, not to mention the poor oven. The whole hob was covered in this sticky, evil goo. It took around 2 hours to scrub, scratch and steam that horrid mess away. After, I was pleased with my cleaning skills, but disappointed that I had nothing to eat at the end. Well, the phrase 'Trial and Error' isn't for nothing.
These are such a lovely snack to nibble on and keep in the fridge for up to a week in a sealed container that is air tight.
The thing I really love about these, is that the middle- caramel is really chewy. So it is more like fudge, opposed to caramel. It keeps its shape and doesn't dribble out when biting into it. This pleases the perfectionist in me. :)
I used milk chocolate to go on top of these, as I didn't have dark and I generally feel that majority of people prefer milk chocolate. But I love all three kinds and think the only kind that wouldn't go well with these would be white, too sickly sweet.
This week has been a great one! Really busy, really exciting and really fun! This week I've had an order for 250 cupcakes for an event for Thinking Day, I've had an order for 20 coffee cupcakes with coffee buttercream for a meeting and I've had an order for Orange and Rapeseed Oil Traybake squares and Apple and Cinnamon Traybake squares for a dinner party! It has been really varied, in bakes and quantities and it was amazing! Here's to more weeks like this!
 |
| Orange and Rapeseed Oil Practice cake |
 |
| Orange and Rapeseed Oil cake, practice cakes |
 |
| 94 Yellow cupcakes for the 250 cupcake order - Thinking Day |
 |
| 92 Red cupcakes for the 250 cupcake order - Thinking Day |
 |
| 94 Orange cupcakes for the 250 cupcake order- Thinking Day |
 |
| 20 Coffee cupcakes for the meeting order |
 |
| Apple and Cinnamon Traybake squares, for dinner party order |
 |
| Orange and Rapeseed Oil Traybake squares for dinner party order |
I really love these big orders, as I do all my orders! The thing about bigger orders is that it really challenges you. It allows me to test myself and what I really love, is seeing it all completed at the end! Amazing or what!? I've enhanced and gained so many skills like; time keeping, administration skills, marketing and advertising skills, accountancy skills, working to a budget skills, liaising skills- and all I can say is I've never been so damn happy in my life!
So if you are having an occasion, any occasion, and are looking for some baked goods to give as gifts, for the dessert or party favours, then why not order from CVL Bakes!? I'm a local, home-catering, passionate baker and tailor your orders to what you want- making it wonderfully unique and personalised!
Just go to Facebook- CVL Bakes and message me and I would love to help out and make your special occasion or any occasion, a great one!
Now, back to these Millionaire Shortbread! First thing's first; the equipment you'll be needing;
The equipment you'll need is;
- 1 x 20cm Square Cake Tin, deep as you need depth for the layers
- 1 dessert spoon
- Non- stick pot
- Wooden spoon
- Baking paper
- Glass bowl
- Large knife
- Space in the fridge
- 1 Fork
The ingredients that you'll need for these are:
Shortbread:
Now, many people will have their own recipe for shortbread and I don't want to get in the middle of you and your shortbread recipe. So if you have a really good recipe, use that. (BBC Food recipe)
- 125g, softened Butter
- 55g Caster Sugar
- 180g Plain Flour
Bake these at 190 C in a fan oven until it is cooked all the way through and is a very light golden brown on the surface.
Caramel/Fudge:
- 150g Butter, cubed and softened
- 150g Dark Brown Sugar
- 397g Can of Condensed Milk
Plop the butter and sugar into a non-stick pot, with the heat on high and stir the butter until it begins to melt. Keep stirring until the sugar and butter are combined and getting to know one another.
Once the sugar and butter and bubbling away, all happy and smelling beautiful, add the condensed milk. Now if you are like me, and seem to be unable to open cans with a can opener, then don't stab it with a knife and wait half an hour for the milk to dribble out into a glass. What you should do is seek someone out, I got my mother, ask them to open it. Once this is opened, it can join the party with the sugar and butter. Yum!!
Now, get those muscles out or lack there of, this really has nothing to do with anything apart from the fact that I enjoy babbling. It is time to stir, stir and well, stir. You need to have the heat on medium- high and constantly stir this butter, sugar and condensed milk mix until it begins to bubble, goes a sticky, darkish caramel colour and is thick. This for me, took a long time to start. Seriously, it was getting thoroughly tedious and I was apprehensive that this was going to turn out like the first attempt at making these. It didn't! :)
After around 10-15 minutes, it began to bubble and go thick. You need to keep stirring it though, as when I stopped, it nearly stuck to the pot. I've already doomed one pot in the house, I'm not too sure mother would be as understanding if I doomed another. (It's not like I even hid it well either. Leaving it outside, charred in front of the kitchen door, isn't what I would call skilled in the art of being sneaky)
Chocolate:
- 600g of good quality Milk Chocolate.
Now, this is the only thing I will say. 3 words. Don't buy drivel! If you buy poor ingredients, your product will taste the same. Now, I know that sounds slightly snobby and possibly controversial, but all I am saying, is the better the ingredient quality, the better the end result will be.
So it has occurred to me that as I am about to talk about the method of how to make these, I've almost already explained that under each of the ingredients sections. But, as I love to talk, I might just add a little more.
Method:
Preheat the oven to 160 C in a fan assisted oven and grease a square tin, with a removable bottom with butter. Line with baking paper and then leave aside.
For the shortbread, you want the butter to be really cold, but still kinda soft. This may seem impossible to some of you out there, but it is possible. You just have to believe. If you leave your butter in a cool, dark and dry place for a few hours, it'll stay cool, but won't go rock hard- this for me anyway, is the ideal texture for making shortbread.
Add the caster sugar and give it another mix for a few minutes until light, fluffy and pale.
Chuck in the flour and mix until just combined. Even though you want it mixed well, you don't want to over mix it, making it tough. Once it has just come together, tip it out onto something clean, preferably a counter top and knead a little with your hands until it is smooth and easy to manipulate. Clean your hands though :).
Tip this shortbread dough into the greased and lined tin and use the back of a spoon to spread and push the dough into all those little corners and against the edges. Use the spoon and spread it all over the surface of the shortbread until it is smooth and evenly spread. Then using a fork, poke little holes all over, to allow the steam out. Not too many though, you don't want the caramel to fall through the holes.
Bake for 12 mins until lightly golden and baked through. Once baked, take out of the oven and leave to cool completely.
For the caramel, (you could do this while the shortbread is baking), as mentioned earlier, bung the butter and sugar into a non stick pot and heat through until it is all melted and combined.
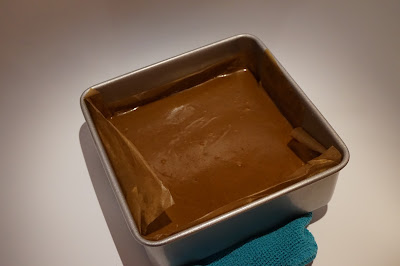
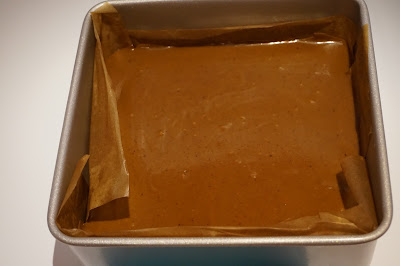
Add the condensed milk and mix constantly until bubbling, thick and a dark brown caramel colour.
 |
| Caramel |
Pour this on top of the caramel, once it has had a chance to set a little. Spread the chocolate on top as you did for the caramel. Once all three layers are done, allow this to sit in the fridge and chill completely.
 |
| All 3 delicious layers. Ready for the fridge |
Once it is all set and firm, dip a sharp knife into some boiling water (this will enable it to cut through the layers easily) and cut the square into little rectangles.
Then plate up and enjoy!
Next time, I think I want to try different flavours, like orange or something? I'm a big fan of orange and chocolate together. This is a really fun, but elegant looking dessert in the end. You could just hack into it when it is set and ready to eat, but if you are serving it for a dinner party or are giving it as a gift, I find that cutting it into little rectangles makes it look really professional and special!
Until next time friends!
Ciara


No comments:
Post a Comment